What Exactly Is PCB Soldering?
First and foremost, PCB soldering is among the most fundamental skills that you can dabble when it comes down to the universe of electronics. The fact is that they go hand in hand, similar to carrots and peas.
And, even though it is possible to learn more about and create electronics without the need to pick up any soldering iron, you will get to find out that a whole new globe will be opened with just a skill like that.
Note that soldering is considered to be the only vital way to repair the components of a circuit.
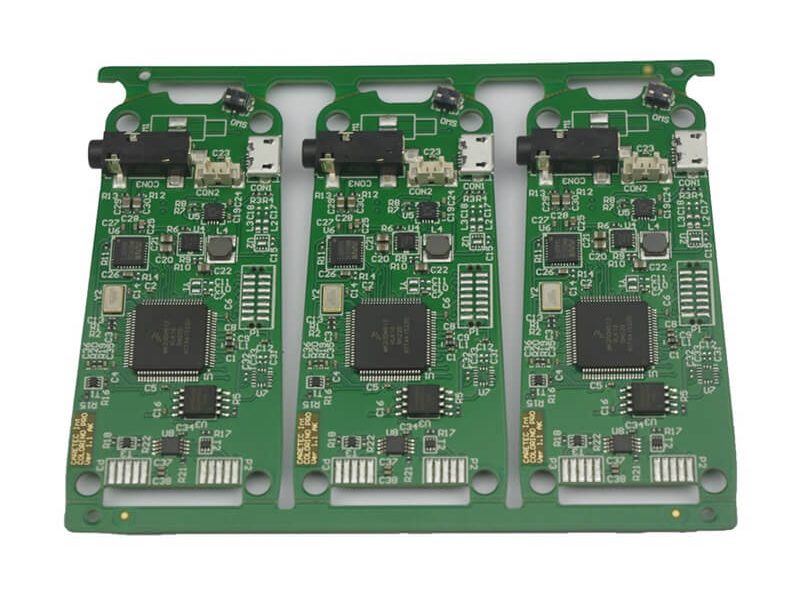
What Is A PCB?
Also known as a Printed circuit board, the PCB is a very common name, and sometimes it is referred to as printed wiring boards or the printing wiring cards. Before PCB emerged, circuits were built via a hectic process of a point to point wiring.
Meanwhile, it led to the frequent failures at the wire junctions and short circuits whenever the wire insulation begins to age and finally crack.
However, when electronics shifted from relays and vaccine tubes to integrated circuits and silicon, their cost and size of the electronic parts began to reduce. Then, electronics became much more prevalent in the goods for consumers
Also, the pressure to decrease the size and cost of manufacturing the electronic products chased manufacturers to look for much more better resolutions. This was when PCB was birthed.
What Exactly Is PCB Soldering?
If you never knew, well, soldering is referred to as a process wherein two or more items are merged through melting and placing a filler metal, which is the solder into the joint.
Note that the filler metal actually has a much more reduced melting point than the adjoining metal. Differing from welding, soldering does not have anything to do with melting the pieces of work.
Also, in brazing, workpiece metal is not melted, but the filler metal is the one that gets to melt at very high temperatures than when it comes down to soldering. Over some decades ago, almost all the solders contained lead.
Furthermore, the solder gets to stick to the tip in a bid to assist in transferring the heat and raising the temperature of the metallic part to the melting point of the solder. Also, this will enable the component to stick very well to the PCB.
Moreover, there are diverse types of PCB Soldering, and they include:
Reflow Soldering
It is the most common technique that people make use of. Here, a specific amount of sturdy solder is placed in a certain location on an object, and it is then sent straight into what is known as a reflow oven.
Wave Soldering
This is a type of selective soldering whereby specific parts of a board are soldered as the components have to be secured on these parts. It is carried out by developing a wave of solder that is liquid.
Hand Soldering
Have it in mind that the default technique of soldering in almost all history of man has actually been hand Soldering. It is taken as a craft in every sense of the word since there is actually science and art to this soldering.
With hand Soldering, there are painstaking precisions and details involved. This is because there are specific joints that digitally controlled or reflow machines cannot undertake.
The drawbacks that are involved in this hand Soldering is the fact that there are not so many products that demand it.
Also, the amount of people entering this field is very few, and the struggle of training a person until they can carry out the process intensively is costly.
Laser Soldering
It is almost the same as the reflow Soldering. In the sense that, the sturdy solder is placed on a board and then heated until it begins flowing and complete the solder joint. But, it is carried out with the aid of a laser in certain locations.
It is the most flexible and ultimate in terms of precision. Sure mount components and through-hole can also be laser soldered too. Furthermore, this type of PCB Soldering tends to pose reduced risks since it makes use of a scalpel and not a broadsword.
The PCB Soldering Process
We will be taking a quick look at the PCB Soldering process. This process involves:
Surface preparation
If you are searching for a powerful yet low resistance solder joint, then a clean surface is vital. All of the surfaces that are going to be soldered must be cleaned appropriately. You can make use of 3M scotch Brite pads gotten from automotive body shops
This is because they will swiftly remove the surface tarnish and not affect the PCB material you want to work on. When the board is finally cleaned to the point of shiny copper, you can make use of a solvent like acetone.
Placement of component
Once you are done with cleaning both the component and board, you are set to place the components on the board. Except your circuit is easy and entails little components, you cannot place all of the components on the board and solder them immediately.
Very likely, you will have to solder some of the components one at a time before you turn the board over and place some more. On a general note, it is ideal that you begin with the flattest and smallest components and move to the big components later on.
How To Avoid And Solve These Issues
In cases whereby it is the buyer that notices any of the issues as mentioned earlier with their PCB soldering, they are advised not to panic as they can all be repaired with just a little patience.
If the buyer wants to make the solder flow and it has refused to flow in the right direction and led to problems, he can relax and allow the join to cool down, then clean and tin the iron after. Any burnt flux from the joint should be cleaned cautiously.
The next step is to allow the iron heat up to a normal temperature. This is followed by reheating the joint and trying to let the solder flow again.
Note that, no matter the issue you come across with your PCB soldering, it can all be resolved. If, as a buyer, you have no idea what to do, it can always be taken to the manufacturer for repair.
Precautions You Need To Pay Attention To
When you are embarking on your PCB Soldering journey, you should:
Avoid touching the tip or the element of your soldering iron. This is because the soldering iron element is always heated to about four hundred degrees.
Do not touch the major flex with your soldering tip because most soldering stations have a heatproof flex for extra protection and security.
Ensure that you return the soldering iron to its normal stand. You should never set up the Soldering iron on your workbench it even around the area you work in as a whole.
Try to solder in areas that are ventilated. This is because the fumes which are being released from the melting solder can be quite uncomfortable. It is always recommended that you move your head to the project’s side and not above the project. Like this, time can always be avoided.
Ensure that you wash your hands after soldering. This is because soldering consists of lead, and it is a very poisonous metal. When you are done with the handling of your solder, wash your hands thoroughly immediately.
Do not wear loosely fitted clothes. Such clothes can make you fall easily in your workplace.
Finally, before anybody thinks about putting on the soldering station, they must have a first aid kit around. Also, it is vital that you are always prepared for work accidents. You should pay attention to your environment and be very cautious with your soldering iron tip.